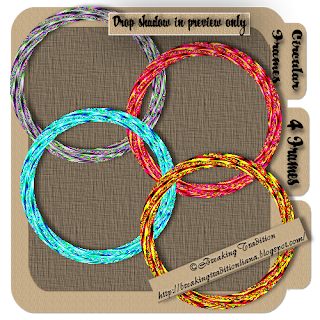
circular frames


here are some circular frames for you all this set contains 4 frames

feel free to recolor as you like

these are for personal use only

you can download : HERE


BCA blog layout


here is a new blog layout for you all this one is for BCA awareness this is my 5th one and ftu like the rest of my stuff on here hope you all like it
just click on image then save


BCA Pretty in Pink


Pretty in Pink (BCA)
[center]This tutorial is my design if it is similar in anyway to another tutorial this is totally coincidental.

i am using the fine art work of Ismeal Rac
this is one of his free tubes
you can find it Here
please make sure you have a licence for his work before you use it

Filters needed
Muras copies

font i used : Al young crafter

add drop shadows as you like

ok lets get started
open new image 500x500 transparent

open your tube of choice and select two colours from it
then go to your rectangle tool and make the lines 2 width
draw out your rectangle in the center of the imge and convert to raster
next draw another one smaller on the left hand side of the first you will want this length ways

you should have this now

[img]http://i869.photobucket.com/albums/ab251/mistofrosleen/Image1.png[/img]

now select inner part of the small rectangle add new layer and paste your tube as new layer
and move over selected then go to selections > invert > delete this should leave part of your tube on the rectange
selections > select none

now select the BCA ribbon that is with this tube or any BCA ribbon you have
go to effects > plug-ins > muras copies use these settings

Circle number - 12
tile mode
behind BG Color - pale pink

encircle

move your ribbons to the bottom layer
now go back to your large rectangle and select inner part using your magic wand
add new raster layer and now go to your tube using your crop tool cutyour tube you only want the brests once you have this done copy and paste into selected go to layer > dublicate
go to your layers section in the bottom right hand side of your psp go to blend mode bottom tube change to overlay and top tube to color (Legacy)

you should have this now

[img]http://i869.photobucket.com/albums/ab251/mistofrosleen/Image2.png[/img]

now go back to your tube
image > mirror
copy and paste as a new layer place it so it looks like it is sitting in the big rectangle, add drop shadow
now paste in the BCA ribbon of choice again move to the right hand corner and add drop shadow

now just add your copyright info and licence number merge visable and you are done

Thank you for trying my tut
Liana

[img]http://i869.photobucket.com/albums/ab251/mistofrosleen/ISmeal%20Rac/PRETTYINPINKBCA2liana.png[/img]
[/center]

BT- MSK set 2


Here is another set of mask set 2 this set contains 10 masks in total please read my tou for my masks other then that please leave me some love
if you like these please download > http://www.megaupload.com/?d=105S6NV6


BT - MSK - set 1


ok her is my first set of masks for you all i hope you all like them and i would love to see some of your work using them and i will then add them here to my blog if you would like to show me some of your work using anything from my blog please email them to me and i would be more then happy to post them on here


any how back to first set of masks i have never done this before so got playing last night and figured it out lol i hope you all like them here is a preview of them drop shadows only in preview


if you like them keep an eye out for set 2 coming soon !!

if you like these please download >
http://www.megaupload.com/?d=WFFBG2OO
"target="new">HERE


frame set 2


here is a new frame set for you all

if you like it please click Here

Fairytastic Blog layout


here is my 4th blog layout there is also a header availabile with this and if you would like both please let me know and i will be more then happy to make it for you just leave a comment with this post with the name of the blog you would like in the header as required will be a link to your blog xx


just click on the image above then right click when it has opened in full size then save


Template 13


here is a new template this is template 13 this includes some word art which and be used either with or without the template but please remember this is for personal use only xx

if you like this template and would like to download it Please click HERE

Blog layout 3


Here is my third bloglayout
hope you like it would love to see some feed back on these
to make sure they are working ok for you all
click on image and save

template 11-12


Template 11 -12
been awhile since made since i made you all some templates so here is some new ones i hope you all like them
you can download : HERE

Janesko girls

Janeslo Girls


This tutorial is my design if it is similar in anyway to another tutorial this is totally coincidental.

I'm using the gorgeous art of Jennifer Janesko.
You have to purchase a license.
if you do not have one you can get one
HERE

Supplies needed

template by myself
HERE

font used ATCitadelscript
HERE

Black Night kit from Jaelop Designs, thank you so much Jael.
you can download
HERE


OK lets get started,
Open new image 600x500.
Open template from your supplies,
Paste as a new layer, now open your tubes main tube in the centre as above,
Add drop shadow at these settings.

vertical -2
Horizontal -4
Opacity 50
Blur 6.00
Color : black

Now go back to your template layer and grab your magic wand and select all the sections of the template
and now open JD paper 4 and paste into selected now go to select none.
staying with your template layer and using your magic wand again select one section of the template and
add new raster layer copy a new tube and paste in to selected
Add drop shadow at these settings.

vertical -1
Horizontal -4
Opacity 50
Blur 6.00
Color : black

Repeat this for the next three sections of the template.
open the butterfly and add to the bottom left of your template add drop shadow duplicate and move to the top right.

Once you have this done add element 7 resize to fit behind your template now add element 10 ontop of the make sure you resize to fit
add drop shadow at the same settings above.

Add copyright info and licence number if required.
Thanks for trying my tut
Liana xx

Elias Girls

Elias Girls


This tutorial is my design if it is similar in anyway to another tutorial this is totally coincidental.
I'm using the gorgeous art of Elias Chatzoudis .
You have to purchase a license.
if you do not have one you can get one
HERE
Supplies needed
HERE

Open new image 600x500.
Open template from your supplies,
Paste as a new layer, now open your tubes main tube in the centre as above,
Add drop shadow at these settings.
vertical -2
Horizontal -4
Opacity 50
Blur 6.00
Color : black
Now go back to your template layer and grab your magic wand and select one section of the template and
add new raster layer copy a new tube and paste in to selected
Add drop shadow at these settings.
vertical -1
Horizontal -4
Opacity 50
Blur 6.00
Color : white
Repeat this for the next three sections of the template.
Once you have this done add doodle of choice behind the template layer,
add drop shadow at the same settings above
vertical -1
Horizontal -4
Opacity 50
Blur 6.00
Color : black

Now duplicate and mirror.
Add copyright info and licence number if required.
Thanks for trying my tut
Liana xx[/center]

Blog lay out 2


here is a new bloglayout for you all hope yous like it xx

here is a preview
just click on image to get full scale and save