Blog layout

Here is my first attempt at a blog layout
i would love to know how it works out for anyone


you can download it : HERE

Spook


Spook

This tutorial is my design if it is similar in anyway to another tutorial this is totally coincidental.

I'm using the gorgeous art of Elias Chatzoudis .
You have to purchase a license.
if you do not have one you can get one

https://www.mypsptubes.com/index.php?p=home

Supplies
Scrapkit by Bluey Halloween freebie available on her blog
http://bluedreamdesigns.blogspot.com/2008/09/freebie-halloween-kit.html


Step 1

•First you open up a new image 450 x 450. You can find this in the top left corner of your psp.
•Your should now have something similar to the image below.
•Once you have this open go to your supplies.

Step 2


•You will get your supplies by going to the top left and click on file, then go down to browse, click on your psp supplies, this should open all your kits, elements , and tubes up for you.

Step 3

•Now go to your Scrapkit
•Once you have done this open it up by double clicking on it.
•Now go to papers and open one of your choosing.
•Then right click on it copy then go to your new image and paste as new layer

Step 4

•Now open up one of your frames, cope and paste this over the paper, resize if needed using the raster deformer tool on the left side of psp under the pan tool.
•Now you should have something like this

Step 5


•Now grab you magic wand and click on the inside of your frame and add new raster layer.
•Back over to your papers and pick a different one now add paste into selected.
•Once that is done go to selections at the top and select none.
•Make sure you pull this layer under your frame on the left hand side.
Add your elements i have used the cauldron 1, bat on chain both brooms the bead string and the word art spook resize these as needed and paste as new layers dont forget to add drop shadows.
The bubbles are out of psp in your picture tool use scale 50 and place over the cauldron so it looks like its bubbling.

Step 6


•Now open you tube

•Copy and paste as new layer.
•Once you have done all add your copyright information and your licence number.
•Finally merge visable and save as.
•Don’t forget your name.

Congratulations you are finished

Liana xx

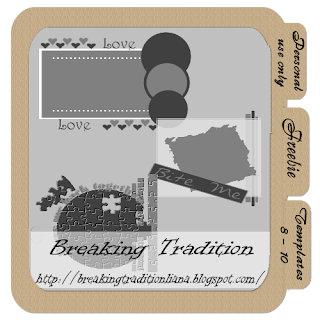
Templates 8 - 10


Here are some new templates for you all.
it has three templates in it one love one bite me and one puzzle
hope you have fun using them plz read my tou and leave a comment on downloading either here or in 4shared thx

Download : HERE

Star element


Got a bit of time on my hands and thought i would try to get a few bit
together for you all hope you like these stars
:)

Download : HERE


All my PTU Kits

All my PTU kits are going to be free for you all i have decided not to sell any more and turn everything i have into FTU for you all
just let me know if i have forgotten any kit or scrap
once you see Download here under the image
where it used to say you can get this kit here

you know that kit is now free to use

ENJOY
:) :)

Wordart


Friendship wordart

Here are a couple of qoutes for you all this is personal use only
but feel free to recolor/animate as you see fit.
but please do not claim as your own
hope you enjoy working with these.
:)

you can download : HERE

More tags made using my tuts


Fairy Magic


This tutorial is my design if it is similar in anyway to another tutorial this is totally coincidental.


I am using the fine art of Ana Rasha :
http://www.anarasha.deviantart.com/

Supplies needed :
http://www.4shared.com/file/110635962/1e962017/FAIRY_MAGIC.html

Ok lets begin

1


Open new image 500x500 white background
Now open up your supplies and click on the template copy and paste as a new layer
add drop shadow on new layer .
Vertical : 5
Horizontal : 5
Opacity : 50
Blur : 5
Color : black

2

now open your tube and using your crop tool cut your tube so you only have her face and copy.
Now grab your Magic wand and select inside one of the boxes
contract by 2, add new layer
paste into selected the face of your tube that you have just copied.
Go to selections>select none. Repeat this with all the squares until all four have her face in them
just remember to mirror on the opposite side so top two are looking in and bottom two are looking out
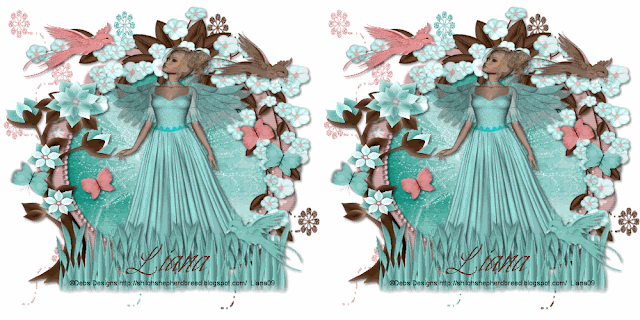
See image above

3

Now go to your tube and undo crop tool so you have the full tube in front of you again
now you copy and paste the full tube as new layer into your tag
and resize as needed and center
Add drop shadow

Vertical : 5
Horizontal : 5
Opacity : 50
Blur : 5
Color : black

on same layer is fine for this

4
now go back to your Drop shadow layer of the template and go to

Effects>texture effects>mosaic antique>
no. of columns : 33
no. of rows : 33
symmetric : Ticked
Tile diffusion : 10
Grout width : 3
Grout diffusion : 20
Now add your copyright info and licence number if required
merge visible.

5

Now copy tag over to animation shop

6

Duplicate to 21 frames
go to edit select all
Open your your bling, edit>select all copy go to your tag and paste into selected
place this one at the lower left hand corner

7

now back to your bling and go up to animation>mirror
and repeat above and place in upper right corner

8

go to view animation to make sure you have got all the frames
Once you are happy with this save
and you are done.

thank you for trying my tutorial


Liana xx

A few tagz

Here are some tags using some of my scrap supplies made by my good friends at
Perfectly Sinful Pleasures
Thank you so much ladies


By Ketta using one of my templates and my freebie scrapkit splish splash
fantastic job hun xx
Photobucket

These two are made by Jackie using my tutorials
Angels Love and Bingo
Another fantastic job. xx


Look forward to seeing some more fab work

Easter Egg Hunt

Easter Specials

Splish Splash Freebie


Thought i would treat you all to a little freebie of this kit
you can download : @ Taggers Palace HERE

Template 7


Download :
HERE

Splish Splash


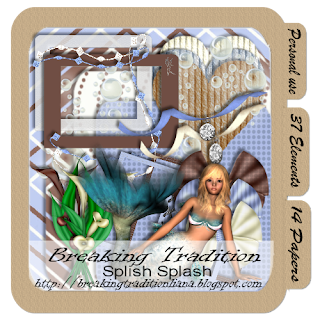
Here is my new scrapkit
This kit is saved in jpeg and png format
it has 37 elements one of which is a mermaid tube and 14 papers
not all elements are shown in preview
this kit is for personal use only

you can download : @ Taggers Palace HERE

Easter egg hunt

The Enchanted Garden


The Enchanted Garden

This tutorial is my design if it is similar in anyway to another tutorial this is totally coincidental.

Supplies

Plug in's needed

ECWS - Edge Fade
DSH FLUX - Bright Noise
http://www.chezzoumba.com/filtres.htm

Scrapkit

Enchanted By Deb's Designs
(I used the tube in this kit)
http://heartbeatzcreationz.com/

FONT

Bilbo: http://www.4shared.com/file/94937644/200ed343/Bilbo.html

Once your ready open your supplies in psp
please remember to add drop shadows and to save regularly
Drop shadow settings i used
VERTICAL = 2
HORIZONTAL = 2
OPACITY = 50
BLUR = 5
COLOR = BLACK


Ok lets begin

1
Open new image 500x500 flood fill white,
open the flower glitter doodle and paste as a new layer
resize as needed.

2
Now open Frame 2 and paste over the flower doodles.
You will need to resize this so that you can still see the doodles behind.

3
Now i want you to grab your magic wand and select inside the frame then go to
selection > modifty > expand > 3
add new layer and paste paper 2 into selected > select none,
drag the paper layer so it side behind your frame.

4
Now get flower branc 1 and paste on top of your frame,
and resize so it looks like its hanging on to it.
It should be sitting on the frame in the top right hand corner.

5
Next to the tree open this up and resize then
paste and move to the left corner of the tag.

(hope you have been adding your drop shadows)

6
Now open your grass and get your crop tool and cut out the blue grass then paste as new layer.
Resize and move to the middle of the tag at the bottom
go to effects > plug ins > ECWS > Edge Fade by 84.

7
Open and paste in your birds and butterflies and place where you want
I have used all three birds and both butterflies.

8
Now its time to add your tube as you can see i have used the one from the kit.
You will need to resize her and paste as a new layer just behind your grass
then move her to the right a bit.

9
Add your copyright info
licence number .
(if required)

10
If you are not going to animate please merge visable now
if you are then dont merge yet.


11

Click on your doodle layer
duplicate x2.
Hide the top layer
Go to effects > plug ins > Dsh Flux > Bright noise > 37
then copy merged and paste into your animation show as new animation.

12
Repeat step 11 but make sure you have swapped the layers around
so that you are clicked on the top layer and bottom one is hid.
Paste this after selected in animation shop.


Now you are done you just need to add your name and away you go

Thank you for trying my tutorial

Liana xx

Template 6


Here is my 6th template for you all this is for personal use only
please leave a comment on downloading

Download :HERE

Miss Bitch


Miss Bitch

This tutorial is my design if it is similar in anyway to another tutorial this is totally coincidental.

I'm using the gorgeous art of Elias Chatzoudis .
You have to purchase a license.
if you do not have one you can get one

http://www.mypsptubes.com/?p=home

Supplies Needed

Scrapkit Miss Bitch by
Bluedream which you can get
http://bluedreamdesigns.blogspot.com/

Filter needed : Unlimited 2
http://www.chezzoumba.com/filtres.htm

Ok lets begin

Dont forget to save regularly and add drop shadows to your layers.

Open your supplies in psp so you have them to hand.

Now open new image 550x550 transparent

Now go to your supplies and open paper 6 now copy and paste as a new layer, then open paper 2 and do the same as paper 6 now grab your freehand selection tool and select Half of paper 2 so its jagged looking not a straight line once you have this done hit delete.

So now you should have like above image.
click on you paper 6 layer and go to effects > filters > unlimited 2 > paper textures > Japanese paper and hit ok.

Now back to top layer and open your elements,
Grab the word charm "BITCH" no need to resize and copy and paste to the right of the image
once you are happy with that open the pink ribbon paste as new layer > resize using your deform tool and move to the left of the image.

Now open the Slave glass bead resize and place over the pink ribbon repeat this with slave flower 1
(see image above)
Open label 1 and move it up the image and resize and tilt to the left a bit, now back to your elements and open label 2 > resize and leave just below label 1.

Open bow 1 and resize so it can sit on the right corner of label 1.

We are nearly there :)

last element needed is the handkuffs
so grab handkuffs 2 and paste as new layer these should be on top of everything else,
resize and move to the bottom left corner.

right now you need to add your tube.
to do this go back down to the layer with paper 6 and copy and paste your tube as a new layer and it should look like she is behind paper 2

Add your copyright info and licence number
(if needed)

merge visable
and your Done

thank you for trying my tutorial

Blue Eyes


Blue Eyes


This tutorial is my design if it is similar in anyway to another tutorial this is totally coincidental.


I'm using the gorgeous art of Keith Garvey. You have to purchase a license to use his work.


You can get one

http://www.mypsptubes.com/?p=home


Supplies needed:

Grazy Sweet Girl scrap kit

http://grazythebeauty.blogspot.com/2009/03/grazy-sweet-girl-freebie-51-elements-10_9510.html

Font of choice


Ok lets get started.

open your supplies in psp.


Open a new image of 450x450,


make sure its transparent.


Now go to frames and open frame 040 (black &pink)

once you have this open copy and paste it as a new layer , resize, and add a drop shadow.

VERTICAL : 3

HORIZONTAL : 5

OPACITY : 50

BLUR : 5.00

COLOR : BLACK


(now keep in mind most of this kit will have to be resized, you can do this using your deform tool.

This just helps clear that up so now i only will have to put in to resize lol)


Now i want you to go to the layer behind the frame.


You can do this on the right hand side under layers.

You still with me, right open one of the papers i have used paper 080 and resize so it fits behind the frame.

Now back to the top layer,


open leaves 040 and leaves 050 and resize both and paste as new layers,

you want 040 under 050 add drop shadows to both these


using the same settings as above.

Now go to the layer below your frame and add your tube,

now add your drop shadow @

VERTICAL : 2

HORIZONTAL : 3

OPACITY : 50

BLUR : 5.00

COLOR : WHITE

Now she should look like she has a bit of a glow.

Now add your copyright info and licence number (if required)

Merge visable in layers and you are done


Thank you for trying my Tutorial

Liana xx

Many don't understand the ADHD mind.

You are amazing. But many don't understand the ADHD mind.
So you can tell them ...
The ADHD mind is no more than this: A heroic soul born desperately in need of sensation.
To you ... a moment is an eternity,
a rule is a tyranny, a process is a purgatory, a joy is an ecstasy,
a daydream is a vision, a hazard is a playground, silence is suffocation,
and completion is death.
Add to this brutally expansive spirit the overwhelming need to risk,
create, and express -- so that without the creating of music or poetry or books or businesses or buildings or something of meaning,
your very breath is cut off ... You must create, must pour out your entire being in creation.
By some strange, unknown, inward urgency you do not feel alive unless you are intimately involved in the risk of self-expression.
Thank you for having the courage to create.
For without your creationsthe world would grow dull and listless,
And the rest of us who are like youwould not have your courageous
act to lean onto inspire our own.

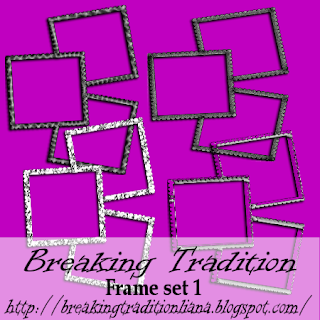
Frame set 1

Here is a set of 4 frames all saved in png format these are full size.
each frame has its own design and can be easily recolored from black and white to a color of your choosing if you would like to purchase this frame set please follow the link below.


you can get this set : HERE

How ADD & ADHD can leads to Compulsive Behavior & Addiction

Here's why ADD and ADHD often leads to compulsive behavior & addiction. I'll also tell you a little known secret about how to avoid addiction and how to heal it.


Individuals with AD/HD have several characteristics that make them more vulnerable to substance abuse, addiction and compulsive behaviors. These characteristics are impulsiveness, sensation-seeking, risk-taking, thrill-seeking, and low levels of inhibition.

The Dopamine reward pathways of the brain are different in people with AD/HD. Dopamine is a chemical in the brain that feels good when it is released and it acts as part of an internal reward system. Dopamine rewards are critical for survival since they provide the pleasurable feelings associated with things like eating and reproduction.

The same release of dopamine and subsequent sensations of pleasure can be produced unnaturally with substances like alcohol, nicotine, cocaine, methamphetamine, heroin, marijuana, and other drugs, by compulsive activities such as eating, gambling, and sex, and by sensational risk taking behaviors. While only a minority of individuals becomes addicted to these substances or behaviors, there is a prevalence of people with ADHD who are addicted to them.

Big Risks - Big Rewards

When you have ADD or ADHD your brain does not reward you with a rush of dopamine easily, so you have to go to more extreme measures just to get that experience of well being. That's why many AD/HD-ers are driven to take big risks and go after big accomplishments like the rebellious thrill-seeking billionaire Richard Branson (Founder of Virgin).

That desperate desire for stimulation is also why many ADHD-ers self-destruct with compulsive gambling, sexual addictions, binging or finding one crisis after another. Extreme situations, whether positive or negative tend to lend enough excitement to evoke that dopamine rush and let ADHD-ers feel alive.

"If the game you're playing isn't big enough,
you'll do something to screw it up
just to make it interesting."
~ J-R

People with ADD or ADHD are what we call DaVinci types, because they are some of the most brilliant, energetic people in our world today; and also because their temperament is the same as Leonardo Da Vinci's.

Environments that lack enough challenge, freedom and stimulation to keep a DaVinci type engaged are likely to lead them to develop compulsive behaviors and addictions. Just knowing this may help one avoid such difficulties.

If you or someone you know struggle with addiction, chances are ADHD is playing a key role. Here's another secret: Finding a creative pursuit that is truly engaging can be a great remedy to addictive tendancies, because it is unexpressed creative impulses that are the driving force behind compulsions and psychological addictions. Discover the keys to this effective therapy in the new book, The Da Vinci Method.


Angel's Love

Angel's Love


This tutorial is my design if it is similar in anyway to another tutorial this is totally coincidental.


I have used to fine work of Zindy Nelson


you can get her art

http://zindy-zone.dk/

YOU WILL NEED A LICENCE HER WORK

Scrapkit by Jaelop Designs

Thank you for use of your kit

Love Hearts

you can get this

http://jaelop.blogspot.com/2009/01/kit-love-hearts.html


Ok let's begin


DON'T FORGET TO SAVE REGULARLY AND TO ADD DROP SHADOWS AS WE GO


open new image 450x450

Open paper 6 and add as new layer you will need to resize this using your deform tool,


Open 18 png (white frame), copy and paste as new layer over the paper, now go back to the layer with your paper and resize so it fits in behind the frame.

Now open 29 png (wording) and place between the paper and frame and resize to fit so it looks as if it is part of the background


Open up your tube and paste as new layer on top of 29png, now resize (if needed) and move to the left corner,

you should have something close to the above image.

Add black drop shadow to your frame layer only, now click on your tube layer and add a white drop shadow so it looks like she is glowing.

back to the top layer


Now back to your Kit and open 1 png (red ribbon) paste as new layer > resize and now go to image>greyscale,

now go effects>Black and white points>negative yellow>apply,

Add a white drop shadow to this too.

Open 22 png (wings) new layer resize and move so it covers the top of the ribbon (it should look like the ribbon is coming out of the bottom of the wings.


Repeat what you have done with the ribbon,

add a black drop shadow to the wings.


Open 24 png ( feathers) and resize, add as new layer add black drop shadow move to the bottom right hand corner of frame

now go to

Layers > duplicate, then to image>mirror and move up to the top left hand corner.

Add your copyright info and licence number (if required)

Merge Visable and save

your done :)

Thank you for trying my tutorials

Liana xx

Bingo


Bingo


This tutorial is my design if it is similar in anyway to another tutorial this is totally coincidental.


Supplies needed


I'm using the gorgeous art of Pinup toons. You have to purchase a license.
You can get one,
http://www.cilmstore.com/
The scrap kit is by a good friend of mine Ladyshannon, Thank you sweetie for the use of this fab kit, you can get the Bingo kit
http://www.4shared.com/file/OobDiokx/BINGO.html
Font of choice
Ok lets begin


Open a new image 500x500

DONT FORGET TO ADD DROP SHADOWS AS YOU GO ALONG

AND SAVE REGULARLY


Now open Glass frame 2 copy and paste as a new layer - resize if needed.

Grab your magic wand and select inside the frame go to selection modify> expand> 3 .


Open BG03 and paste into selected then select none.

Now go to your Bingo cards and open in turn and paste around the frame tilting out slightly using your deforming tool (see image above).

you may need to sharpen these after resizing them just go to adjust>sharpness>sharpen.

Now open you Bingo Dobbers

copy and paste as new layer and move to the corners i have used 2 different colored dobbers and left one a bit bigger then the other.

now open your tube copy and paste and move into the middle of the frame (see image above)


Now add your copyright info and licence number (if required)

And save


Thank you for trying my tutorial


Liana xx

Love Letters


Love Letters

This tutorial is my design if it is similar in anyway to another tutorial this is totally coincidental.

I'm using the gorgeous art of Elias Chatzoudis .

You have to purchase a license.

if you do not have one you can get one

http://www.mypsptubes.com/?pcsid=c12615a9bc66216b16beabd2686169fd&p=login

Supplies needed

fabulous scrapkit by Amanda.
Thank you Amanda.
kit is called Girlz and you can get it Here
http://definitiveside.blogspot.com/

Mask 239 by Vix
http://www.freewebs.com/vixpsp/masks.htm

Font of choice.

I used Edwardian script ITC


Ok lets begin.

Open new image 450x450

Flood fill black.

Open paper 18 copy and paste as a new layer, resize if needed

load your mask, and merge group.

Open Tattoo 4 copy and paste then resize move to the left of the tag.

Copy and paste butterfly 7 place in the top middle and ribbon 1 place at the bottom.

Now open you tube and paste as top layer, move to the right hand side of the image, copy and paste tattoo 4 and resize so it sits on her arm.

Now add you copyright info and licence number (if required)


Thank you for trying my Tutorial

Liana xx

Don't Touch This


Don't Touch This


This tutorial is my design if it is similar in anyway to another tutorial this is totally coincidental.


I'm using the gorgeous art of Keith Garvey. You have to purchase a license to use his work. You can get one

HERE


Supplies needed:


Template 5
HERE


Font of choice

I used – Alexei copperplate itc normal

Doodles of choice


Ok lets begin


Open new image 400x400.

Copy and paste doodles of choice as new layer resize if needed, now duplicate and flip.

Open Template 5 and select the 3 smaller squares and paste them separately as new layers.


Then copy and paste rectangle position them as they are in the file.

Grab your magic wand and select the inner part of your square.

Flood fill with gradient> metal steel repeat for each section of the template.


Open tube and grab your crop tool, crop a section of the tube and paste into selected on the template do this with all three squares.

Now grab your magic wand again and select the inner part of your rectangle,

Copy and paste full tube into selected

Add your copyright and licence number (if required)

Merge visible

Save

Now just add your name and you are done


Thank you for trying my tutorial


Liana [/center]

Sparkle

Been awhile since i made a scrapkit for you all,
so thought id get back into the swing of it slowly with this kit called Sparkle there are plenty of papers and elements in it for you to play with.


you can download : @ Taggers Palace HERE
div>

Another award woohoo

thank you so much Jay for this award

now to pass it on to 5 deserving people, hard to choose!
id like to offer it to

1.Brooke @ Butterfly Blush Designs
2.Jay @ Butterfly Lounge
3.Diane @ Candys Treats
4.Vix @ Vix PSP
5. Shannon @ Memories made easy

Sister hood award


thank you Ladyshannon for this award

i am passing it on to
1.Jay @ Butterfly Lounge
2.Diane @ Candys Treats
3.Vix @ Vix PSP
4.Missy @ Psp pastime
5.Michele @ Watched By Angels

Template 5


Here is another template for you all

you can download : HERE